Saturday, September 27, 2008

Green Pepper Jelly

I had never heard of green (or red) pepper jelly before a few months ago.
This isn't the kind of jelly you have on bread with peanutbutter. Although I 'spose you could.
You use green (or red) bell peppers, & you can add some heat buy adding a few jalapenos, red pepper flakes, or even cayenne pepper. The best way to eat this jelly is on crackers with cream cheese. I've also seen it online with toasted pita & goat cheese.

Green Pepper Jelly
5 lg. green bell peppers (about), seeded
2 jalapenos (seeded or not, considering how hot you like it)
OR
1 t. crushed red pepper flakes (or more if you'd like it hotter)
5 1/2 C. sugar
1/3 c. lemon juice

1 pkg fruit pectin (I used the 3 oz. liquid pouch)
3/4 C. apple cider vinegar
green food coloring (if you prefer, you don't have to use it)

Finely chop peppers in food processor. Strain, pressing lightly. Measure 2 full cups & 1/4 c. pepper juice. Discard remaining juice. Combine the 2 cups of ground peppers, 1/4 c. pepper juice, sugar, & vinegar in 4 quart pan. Bring to a boil, stirring frequently. Remove from heat & let stand for 15 minutes. Reheat to boil, stirring constantly. Add lemon juice & return to boil for 1 minute, stirring. Add pectin & let boil for 3 minutes, skimming off the foam as it accumulates. Pour into sterilized pint or half pint jars & process in a boiling water bath for 10 minutes, making sure the water is 1/2 to 1 inch above the lids. Remove from water & let jars sit on the counter overnight. Check in the morning that they have each sealed (they usually seal within seconds of removing from the water).
Makes 6 half pints.


The first time I made this I used 2 jalapenos, but I did remove all but about 2 or 3 of the seeds.
It really was not hot at all. It was so good that in one evening we 'dusted off' a whole half pint jar (that sounds funny...a whole half pint LOL).
The second batch I made a few days later, I used 1 t. crushed red pepper flakes. I liked this better as it has just a bit more heat to it. But not too much. You could surely add more if you'd like. I feel like I've found a new recipe & I'll never let peppers go to waste again! If I've got too many (which is mostly every year), I'll just make it into this jelly. My dh & I ate a plateful of these tasty crackers last evening while we watched the debate on tv. The taste of this jelly just goes perfect with cream cheese. YUM!

Friday, September 26, 2008

Friday Felicities


Things that have made me happy this week:
Our 5 year old read his first sentence!
It was, "The pig sat in the mud."
Watching your child learn to sound out words & read is just one of the greatest moments ever.
In other school happiness, our 17 year old daughter just aced her 9-week math exam. And it was 4 pages long. 100% WOOOOOOOOT!
Green peppers have been making me happy lately too.
As in:
Grilled, stuffed peppers. Stuffed with our sweet corn & cheese & onions. Oh yummmmm.....
AND, Green Pepper Jelly! Oh, it's so good on crackers with cream cheese!
Both of these were new recipes & both were keepers.
Thoughts of going fishing tomorrow!
FRIDAYS! FRIDAYS! FRIDAYS!
WEEKENDS! WEEKENDS! WEEKENDS!

Tuesday, September 23, 2008

Kitchen Tip Tuesdays


I can't imagine why my kitchen tip this week has to do with tomatoes! LOL
Actually, you can use it for anything, it's not exclusive to tomatoes.
I guess I call it tomato scrap trash.
When we are canning tomatoes, we stand at the sink where we clean them, core them, & cut out any bad spots. The scraps go in one bowl & the good parts into a pan. The good parts get dumped into a larger pan that is on the stove. The scraps get dumped into the trash.
Well, if your trash isn't close to the sink, you have to walk across the kitchen to go dump your scraps in the trash. Not only does this take extra time, but it also usually results in many drips on the froor. So a few years ago my husband came up with this trick.
You hang a good strong trash bag on one or your nearest drawers. Put it around the lip of the drawer, making sure you get it in both corners, & then close the drawer.
Here's a picture of a pretty full one from the day we did tomato soup & pizza sauce. It was so heavy that it was actually only holding on by the corners at this point. LOL


Make sure it's not a bag that easily rips, because then you'd have a really big mess!
I've never had one rip, thankfully. This is a tip that we use everytime we can tomatoes!
Thanks go to my dear husband or this one! :)

More Kitchen Tip Tuesdays can be found at Tammy's Recipes.

Sunday, September 21, 2008

Pizza Sauce & Favorite Canning jars

Here is the pizza sauce I canned the other night (I mean the other morning! LOL)

Again, I got this recipe from Tammy's Recipes. Here is the link to Tammy's Pizza Sauce.
I used her recipe for the seasonings, but I did go a little different route as far as the technique for making the sauce.
I just couldn't bring myself to drain the juice off the cooked tomatoes. That tomato juice is just so flavorful! I did some searching on the net, & most recipes for tomato sauce call for you to cook the juice down to a sauce instead of draining the juice. So that's what I did. It took forever, but I felt good about not draining the juice. :)

I have no idea how many pounds of tomatoes I had. Earlier in the day I had made the tomato soup, so this was the other half of the tomatoes that wouldn't fit in all the big pans I made soup in! I had my big 16 quart pan about half full of tomatoes, & my two 8 quart pans full.

1. Cook tomatoes with about 3 or 4 onions, diced; 5 or 6 cloves of garlic, minced; & 2 or 3 bell peppers, diced, for about an hour, or until everything is tender.

2. Run them through a colondar or food mill to remove seeds & skin.

3. Return to pans & season.

Season with:

1/2 cup white sugar
2 tablespoons salt
5 teaspoons oregano
2 teaspoons black pepper
2 teaspoons basil
You can adjust these measurements acording to how many tomatoes or how much juice you have. I had a lot, so I did add more.

4. Cook down 1/3 for a thinner sauce or cook down 1/2 for a thicker sauce.
5. Process in pint jars.


This took me a long time to get it to cook down, maybe a few hours! But it was so worth it! The house smelled wonderful too.

The next day, our 17 year old daughter wanted to dip her cheese stick into some of this sauce, so we opened our first jar. It was a big hit! :) And, for lunch that day I made some little tortilla pizzas with it. It was very good!

Thanks for another great recipe Tammy!

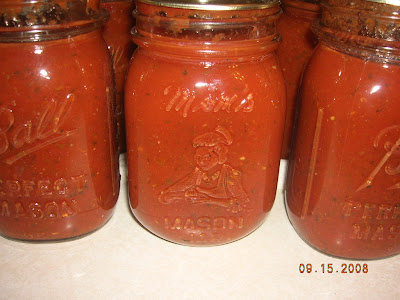
I also wanted to show you some of my favorite canning jars. In the picture above, that is a pint jar with a picture of a grandmother on it. I think it is so neat! It is a Mason pint jar.
And then here is a close up of some of my tomato soup jars. The one on the right is one of the older blue Ball jars. It's a wide mouth blue jar & it just seems so heavy & strong. I know the blue Ball jars are strong. The other day I was putting my half gallon blue Ball jars back up on top of my high cabinets when I realized it wasn't safe to use them for canning. I was STANGING on the counter & I DROPPED a half gallon blue Ball jar from up there. I knew it would shatter in 1000 pieces when it hit the floor. It BOUNCED! Can you believe that?!

That jar on the left of the blue Bell jar is one of my favorites. It has a square pattern all over it, like a grid. I have no idea who made it. It doesn't say Ball or Kerr or Longlife anywhere one it. I have had it for at least 20 years. Actually, there are 2 or 3 of them & I have no idea where I got them & who made them. They are just so different that I think they are really cool.

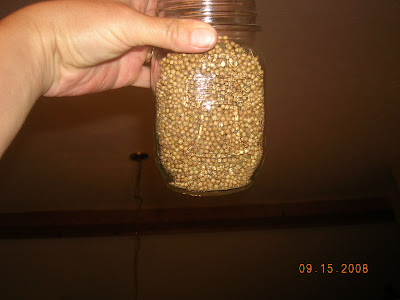
Here's where I dropped the half gallon blue Bell jar from! I'll never forget seeing that big glass jar BOUNCE!And here's a little pint jar that I like. I don't know if you can see it, but just like 90 percent of the stuff produced in 1976, it has the Liberty Bell on it & 1776-1976. LOL I am filling it with corriander seeds that I'm slooooowly harvesting off my dried cilantro plants.

I know I have other jars that are fun & different, but they are ALL put away. I actually had to go buy some NEW jars last weekend. I haven't bought new jars in ages. I'd so much rather find a big box of them at a garage sale rather than pay so much for brand new ones!

Thanks again, Tammy, for the Pizza Sauce recipe!


Saturday, September 20, 2008

Homemade Tomato Soup

Oh....this is SO GOOD!
Tammy's Recipes is one of my new favorite food blogs to visit. I found her after being linked to her wheat bread recipe, which I have made a few times now, but haven't posted it yet. I started checking out her canning recipes & found her recipes for Homemade Tomato Soup . We've been growing tons & tons of tomatoes for so many years, I can NOT believe I never once thought of making homemade tomato soup, much less canning it! Tammy's recipe is for a big batch which makes about 10 quarts for canning. She also gives directions for a smaller batch. I did this first in order to make sure that we liked it. Oh, we LOVED it!
In the above small batch, this is how I made it.
Simmer 2 quarts of home canned tomato juice. ( Or cook down tomatoes & run it through a colonder or food mill to make approx. 2 quarts of juice.)
Add seasonings to taste. I added 1 t. onion powder & 3/4 t. celery salt. My tomato juice was already salted so I didn't add regular salt. I also added some pepper & a bit of garlic powder.
In a seperate pan, melt 6 T. butter. Stir into that 6 T. flour. Then add a few cups of the simmering tomato juice to the butter/flour mixture. I guess you'd call this a tomato roux! LOL
Stir until it thickens & then add it all into the tomato juice that is simmering.
When this was ready to serve, I did add 2 cups of half & half.
Stir. Eat. Enjoy!
It was really excellent. I will not be buying canned tomato soup again!
So, the following weekend after making this soup, we had our FOURTH big pickin' from our tomato plants. We thought surely we wouldn't get as much as we had been getting. Plus, they aren't in the best of shape now. They are smaller & have more spots to cut out now. I was shocked that we had 13 or 15 bags (I can't remember now). I figured I should weigh them since I was going to be converting a recipe that called for 1/2 bushel, or approx. 26 pounds of tomatoes. Also, I was planning on making her pizza sauce or seasoned tomato sauce that day too. I weighed each bag, & the grand total was 128.5 pounds of tomatoes! No, I am not kidding!
Long story short...I finished canning that night at 4:40a.m.
Here's the result:
26 quarts of Homemade Tomato Soup & 14 pints of pizza sauce!
I did do one thing differently in the big batch. I added 1 whole stalk of celery (with leaves) & about 5 onions to the tomatoes as they cooked. Once it was juice I did still season with some more celery salt & onion powder, just not as much.
Thank you Tammy, for giving me something else to can with these tomatoes!
This soup is delicious! And so is the pizza sauce, but I'll post about that another day.

Tuesday, September 16, 2008

Kitchen Tip Tuesdays


My kitchen tip this week is the rubber band trick to keep lids on.
I do this when I'm taking a covered dish somewhere.
It is a simple little trick that I'm sure most people know. But at one time I didn't know it & when I learned it I was thrilled to know it! :)
Here's a picture of our green beans that were getting ready to leave for the church pitch-in.
Now when I take things, I don't have to worry about the lid rattling around or even falling off.
You take a large sized rubber band & hook it under one handle. Then make one twist in the rubber band.
Then go past the middle nob in the lid & make another twist.
And then hook it onto the other handle.
And there you go, the Rubber Band Trick!
I have to give thanks to one of my babysitting parents for this. A few years ago my husband was having a really bad time with his Multiple Sclerosis & this babsitting mom brought us some beef stew in a crock pot & it had the lid attached with a big rubber band. I stared at the pot being thankful that she'd do this for us, & then trying to figure out that rubber band! LOL
So thanks to Gracie's mom, I now know the Rubber Band Trick & I use it often. :)

Friday, September 12, 2008

Friday Fleicities

If this takes me more that 2 minutes, it will post on Saturday, so I reckon it'll be Saturday Felicities.

  • My Rock & my Redeemer
  • His Word
  • BLT Sandwiches Mmmmmmmm
  • Homemade wheat bread!
  • Homemade tomato soup
  • Both of those recipes are from a new cooking site I found, Tammy's Recipes!
  • Fridays!!!
  • Weekends!!!

Yep, it's 12:02. I wish I could have got this done earlier.
If you want to see more Friday Felicities click on Becky's site.

Thursday, September 11, 2008

ONIONS

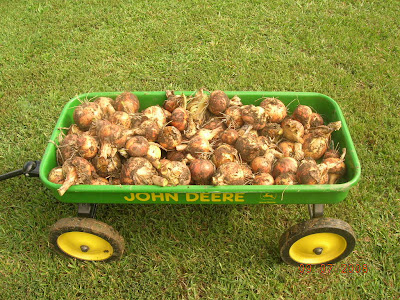
We pulled our onions up last weekend & got this wagon load!

We got 3 WalMart bags full! And they were heavy bags. I had to carry them in the house one at a time & I can't believe they didn't break the bottom of the sacks open.
To show how cost effective gardening is, I think we paid $2.25 for the onion set we planted. I can't imagine how much it would cost to buy three heavy WalMart bags full at the store!
Here they are washed & drying on the counter. I let them dry completely & then put them in onions sacks that I have saved. I keep them in a in a dark cabinet (with our potatoes) & they should last a really long time. I doubt they'll last the whole winter because I use onions so much. But they'll last a good long time that's for sure!
I really have been thanking the LORD daily for such a bountiful harvest!

Wednesday, September 10, 2008

Tuesday, September 9, 2008

Kitchen Tip Tuesdays

I would like to join this weekly Kitchen Tip group. It is hosted by Tammy over at Tammy's Recipes. Here is the link to the Kitchen Tip Tuesdays post.
My tip is Tea Cubes!
I love to drink iced tea, but I don't like the way ice melts & waters down the tea.
So I fill an extra ice cube tray with tea & make tea cubes. It keeps my tea cold, but when it melts it doesn't water it down.


I can be seen every day with this glass (or one like it!) in my hand or sitting on my desk.

Sorry 'bout the onions in the background. The other tea pictures didn't turn out. As you can tell, I am not a professional photographer. :) I'll post about the onions another day...

Saturday, September 6, 2008

Camomile

I am loving camomile!
It smells so wonderful. It smells kind of like apples. I pick the flowers off every couple days & put them on this saucer to dry. This is about how much I get when I pick. The size of this plate is pretty small, it's a saucer for my tea cups.
In a few days when they have dried, I put them in this little half pint jar. I leave the lid off for continued drying.
I keep both of these on top of my microwave. And every few days I pick & dry some more.
I've only had 1 cup of plain camomile tea, that was back when they first started blooming. The directions for camomile tea are:
Use 1 T. fresh camomile flowers
or 1 t. dried flowers
Steep in boiling water for 5-7 minutes. Add sugar or honey to taste.
I drink regular hot tea in the mornings, & sometimes I will add just 1 dried flower to my cup, & it really flavors it so nicely. It's wonderful! This is probably how I will usually drink it. Although, a cup of nice camomile tea in the evening during the fall & winter is sure relaxing! I'm looking forward to using my own, instead of the Celestial Seasonings.
:)

Friday, September 5, 2008

Friday Felicities


I've been so behind!
Here's my list for the last few weeks!
  • Camping with my family in the back yard this weekend!
  • S'mores!
  • Sliced, salted tomatoes
  • Being done reading Macbeth. (notice I didn't say reading Macbeth, I said being DONE!)LOL
  • Camomile
  • Having 4 weeks of school under our belts.
  • Seeing our youngest sounding out letters. Wow, this really does make me happy.
  • Remembering our oldest (senior) at the age of our youngest...(K.)
  • Watching our daughter do the Communion Meditation at church on Sunday.
  • Our daughter leading the church in prayer. Amazing.
  • Hearing about how our 5 year old lectured our German Shepherd about something Jesus did.
  • Getting to the chapters in Job where God finally SPEAKS! I LOVE that!!!
  • FRIDAYS!!! FRIDAYS!!! FRIDAYS!!!

Click here to read more Friday Felicities.

Thursday, September 4, 2008

Canning more tomato juice...

Canning is still going on at our house.
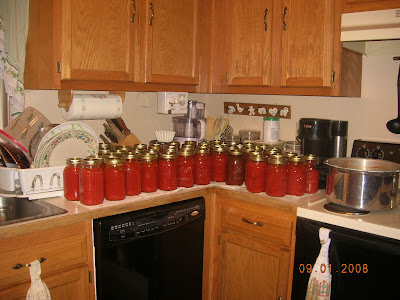
This is what my kitchen looked like when I went to bed on Labor Day:


Yep, more tomato juice! And I went to bed with a dirty canner on the stove! LOL
It was our 3rd big pickin' & canning of tomato juice. I didn't take a picture of the bags on the table, because it looked like the same picture from last time, again. LOL
Only this pickin' we got more for some reason (it usually starts tapering off) & we got 51 more quarts of juice. We FINALLY got them all put away, most of this load is now in boxes in one of our closets, thanks to my dh for doing that! Our tomato plants have really produced tremendously this year. Thank you Lord!
So this is just ONE of the reasons I've not been on this computer very much lately.

I have so much more I can post about the preserving that's been going on around here. I have also been freezing stuff too. I have shown you the corn, but I've also frozen diced (& also thin slices) green peppers, & also freezer slaw. And now for the first time I am drying stuff because of the herb garden. I have some pictures of the camomile I am picking almost daily & drying.
Also some other herbs...but that's for another day.

I'm off to BED!