Friday, December 4, 2009
5 Minutes for Mom Christmas Give-a-Ways
Yes, I am still here.
There have just not been enough hours in the day for me to get on the computer very much.
I know...I'm a broken record.
My son wanted me to look something up for him, & as I was bringing up the Moose A. Moose & Zee balloon math counting game, he asked me if I remembered when I went to 5 Minutes for Mom. LOL! How did he KNOW this or REMEMBER this?! So as I laughed, I clicked on over.
And I saw that they have a big Christmas give-a-way, that ends TONIGHT, if I'm reading it correctly. They also have an Under the Tree program for needy families.
So click on over to 5 Minutes for Mom (if ya see this in time) & enter to win some cool prizes!
I have added to linked buttons on the right hand side of my page, since I can't figure out how to add it in this post. LOL
You can click on my links or the buttons!
Hope ya win something.
:)
Saturday, October 31, 2009
Fully Loaded Baked Potato Soup
I have to get our regular groceries at WalMart, just simply because of the prices. BUT, I will not get our meat or produce there anymore. I just simply refuse to now. This "little" grocery store just has what I need. Good food. Plus, an older lady who comes in on Saturdays to pass out samples. And it's not just product samples. It's almost always something homemade. And she has copies of the recipe for you to take along with your sample. Isn't that just really neat? One day it was chicken bbq pizza, another it was a hamburger & rice casserole. Last fall I remember trying a 3 bean chili that I really liked ( I even made it & took pics...I wander where that went to...I'll have to find that & post it!). Well a few weeks ago it was this potato soup. I took the recipe copy & after making sure I had all the ingredients, I took it home & made it that day. It was THAT good.

Fully Loaded Baked Potato Soup
Approx. 2 pounds potatoes, scrubbed & cubed fairly small (don't peel)
1/2 pound bacon, sliced into small bits
4 C. chicken stock
4 green onions, sliced
2 C. milk
1/4 C. flour
2 C. cheddar cheese, shredded
1 C. sour cream
salt & pepper
Cook bacon in a large soup pan until just crisp. Add cubed potatoes & cook on medium for about 10 minutes until they begin to cook. Add stock, green onions, & pepper. Continue to cook until potatoes are tender. Whisk together the flour & the milk until combined. Add to pan & stir while heating & thickening. Add shredded cheese & salt, & more pepper if you need it. Once all cheese is melted, add the sour cream. Server garnished with bacon bits & green onions.
This really is SO GOOD! I've never thought of a loaded baked potato as a soup before, but really, it works! And it's great on these nippy fall days. Look how much it thickens up in the frig overnight.
Nuttin' like taters & bacon cookin' in a cast iron skillet. :)
I hope you enjoy this comfy potato soup. We sure did.

Saturday, October 10, 2009
Zucchini Custard Pie
An older lady from church gave me this recipe. Actually, she made this pie using zucchini I had given her, & then she called & asked for more zucchini to make another pie! She had told her sister she would save her a piece of pie, but then she got company & she served the rest of the pie to them. She told me her sister was mad at her, so she wanted to make another pie for her sister. I told her I must have this recipe! She gave it to me at church a few weeks ago.

As you can see from the picture, you put little pats of butter on the top when you put this in the oven. I don't think I'll do that again, it really doesn't need that. It was good, but I just didn't see the need of it, really. This is a wonderfully creamy, custard pie. And to be honest, you can't even taste the zucchini. So if you didn't want to tell anybody that it has a cup of zucchini pulp in it, you really don't have to. I didn't tell my family it had zucchini in it until we were nearly done eating it. *snicker*
Here's a picture of the piece I ate.

Zucchini Custard Pie
1 cup of zucchini pulp (peel & seed a zucchini. Cut it into chunks & cook in water until tender drain well. I used my hand mixer to turn it into pulp.)
1 C. sugar
1 C. evaporated milk ( like Milnot)
3 T. flour
2 eggs
pinch of salt
1 t. vanilla
Blend all ingredients in blender (I used my food processor) for 1 minute, put in pie shell. Top with cinnamon & add about 3 pieces of butter in chunks. Bake 375 for 45 minutes.
This was very tasty. It's a nice old fashioned custard. I had my pie cut into 8 pieces. I would say that my family of 4 really liked it, because there were only 2 pieces left.

And we had to split these last two pieces up the next day so we could all get another piece. :)
When we had this for dessert after supper that first evening, it was still a little warm. But I have to say that I thought it was even better really cold. Oh! it was delicious!
I want some more!
Wednesday, October 7, 2009
Sweet 'N Sour Beef 'N Cabbage
 I know I'm a week late, but I would like to submit this to Tammy's Recipe Swap. She featured cabbage last Wednesday, & I've thought all week that I'd like to get on here & post this recipe.
 I found this recipe in an old cookbook that I was getting ready to donate to the library. I went all through it first to see if there were any recipes that I wanted to copy. This recipe jumped out at me! I love cabbage & I love cabbage rolls, though I haven't had them in years. This cook book is titled, Better Homes and Gardens All-Time Favorite Hamburger & Ground Meats Recipes. It was published in 1980, so the cover photos look a bit dated. It's funny, but back in the late 70's & early 80's I don't remember things looking this dated. LOL
Sweet 'N Sour Beef 'N Cabbage
1 1/2 pounds ground beef
1/2 C. chopped onion
1/2 C. chopped celery (opt.)
1/2 C. chopped green pepper
2 T. quick-cooking rolled oats
2 T. chopped parsley
2/3 t. salt
1/4 t. garlic powder
1/8 t. pepper
1 medium head of cabbage
1 15 oz. can tomato sauce
1/4 C. cider vinegar
3 T. brown sugar
1/2 t. salt
dash pepper
In slillet cook ground beef, onion, celery, & green pepper till meat is browned; drain off fat. Sprinkle meat mixture with rolled oats, parsley, 3/4 t. salt, garlic powder, & 1/8 t. pepper.
Core cabbage; cut into six wedges. Place atop meat. In bowl combine tomato sauce, vinegar, brown sugar, & the 1/2 t. salt & a dash of pepper; mix well. Pour over cabbage & meat. Cover & simmer for 15-20 minutes or till cabbage is tender. Serve at once. Makes 6 servings.
This is really good. It has a wonderful sweet 'n sour flavor that is perfect with the cabbage.
I made this again a few weeks ago & my cabbage was pretty large. I cut it into more than 6 wedges, but I still had to cook it a little longer. I also go just a bit heavier on the seasonings too.
I hope you try this & enjoy it as much as we do!
Saturday, September 26, 2009
Homemade Ketchup
I have to say, that for years we've joked about it. I've heard more than just a couple people say that their moms made homemade ketchup once when they were kids. And they made a bit of an 'icky face' when they said it. LOL And, if you've ever watched the "Vacation" movies with Chevy Chase as Clark Griswold, there's the scene where they are having a picnic with Cousin Eddie & his family. Ed is fixing hamburger helper (on the grill!) without any hamburger, & Ed's daughter Vicki is stirring the cool-aid with her hands. Trying to be polite, yet showing a bit of sarcasm, Clark fixes his "hamburger" & as he dips a thick red substance from a jar he says, "Reeeal tomato ketchup Ed?" LOL!
I found a recipe & I thought I'd just try making it once. It's a small recipe (& I even halved it so it would be smaller), so I figured it wouldn't be too much work or too many tomatoes wasted if we didn't like it. But, if we did like it, well, great!
I found this recipe here.
It's a nice link that tells about canning tomatoes. It's also where I got one of my spaghetti sauce recipes, but that's for another day...or two.
Tomato Ketchup
24 pounds ripe tomatoes
3 cups chopped onions
3/4 teaspoon ground red pepper (cayenne)
3 cups cider vinegar (5 percent)
4 teaspoons whole cloves
3 sticks cinnamon, crushed
1 1/2 teaspoon whole allspice
3 Tablespoons celery seeds
1 1/2 cups sugar
1/4 cup salt
Yields 6 to 7 pints
Wash tomatoes. Dip in boiling water for 30 to 60 seconds or until skins split. Dip in cold water. Slip off skins and remove cores.
Quarter tomatoes into 4-gallon stock pot or a large kettle. Add onions and red pepper. Bring to boil and simmer 20 minutes, uncovered. Cover, turn off heat, and let stand for 20 minutes.
Combine spices in a spice bag and add to vinegar in a 2-quart saucepan. Bring to boil. Remove spice bag and combine vinegar and tomato mixture. Boil about 30 minutes. Put boiled mixture through a food mill or sieve. Return to pot. Add sugar and salt, boil gently, and stir frequently until volume is reduced by one-half or until mixture rounds up on spoon without separation. Fill pint jars, leaving 1/8-inch headspace. Adjust lids and process.
I processed mine in a hot water bath canner for 15 minutes.
Also, I really wasn't sure how I felt about using so many tomatoes for this in case we didn't like it, so I halved the recipe. My yeild was 5 pints.
Here is a picture of the juice. This is after you have cooked the tomatoes & have added the vinegar that has been seasoned & then run it through your colonder or food mill, so it's actually ketchup flavored juice.
 And here it is after it has cooked down by half. It took me a few hours of simmering to get it to cook down by half & become thick enough. I couldn't get a good picture because of the steam.
 My 5 pints are in my new water bath canner in this next picture. One of my very best friends sent this to me. I actually have no idea which one sent it, but I do know that it was 1 of 8 lovely ladies that have been my very best friends for years. Or maybe all of them sent it! Thank you ladies!
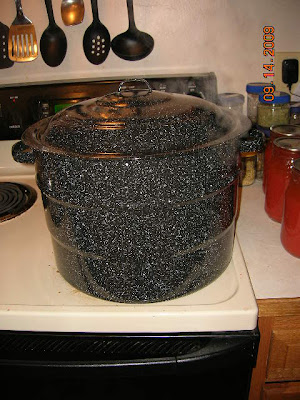 (There's some jars of tomato juice next to my stove that I hadn't found storage space for yet. And behind those jars sits my jars of my dried herbs. )
 And here's a close-up. See, it does really look like real ketchup.
 So, I am glad I made this ketchup. Since I halved the recipe, I only used about 12 pounds of tomatoes. It does take a lot to cook down to get 5 pints. But, it tastes good, so it was worth it.
 Now while eating supper somebody just has to say, " Reeeeal tomato ketchup?"
LOL
Monday, September 14, 2009
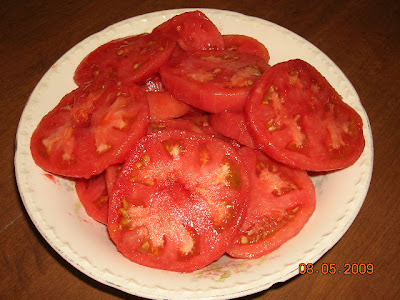
Tomatoes

Today I'm making 2 different recipes for spaghetti sauce. I've never canned spaghetti sauce before, so this is new to me. I have enough tomatoes here that I'm sure I'll be canning some more juice today too. One recipe calls for 4 gallons of tomatoes, so that's why I have some tomatoes in that 5 gallon bucket. That was the best way I could figure to measure 4 gallons of tomatoes.
Last night I made 5 pints of ketchup. I have never done that either. I wanted to try it. We'll see how it tastes in a day or two. If it's good I'll post the recipe.
And I'll post about today's spaghetti sauce too.
The house smells AMAZING.
Sorry I haven't been on here much, I'll try to do better! :)
Wednesday, September 2, 2009
Baby Corn
Baby corn isn't just corn that's not ready yet. It is little bity ears of corn that grows with a larger ear of corn. Not every ear has baby corn on it. Sometimes there will just be one, usually there's two, but every now & then there's three! I picked up one ear to shuck & it had four! As soon as I started shucking it, I realized I should have taken a picture of it. It was really amazing looking. So the next ear that had three babies on it, I snapped this picture. You can see that everything about the baby ears is a miniature of the big ear. And you can see in the background to the left are the regular ears that have been shucked, & to the right is the growing pile of baby corn that has been shucked.
 Also, sometimes the baby corn doesn't grow on the outside of the big ear, but on the inside, just under the first few layers of husk. So you may think you have two baby ears, & then start shucking to big one only to find one or two more on the inside!
Our baby corn filled a WalMart bag full. You can see that there's one piece in there that's not actually baby corn. It had produced a few kernals, so it was just an immature cob. Immature cobs do not taste good. It snuck into this bag, but it did get tossed out. Here's what a nice bowl of cooked baby corn looks like. You can either boil it or steam it. Add a few tablespoons of butter & some salt & pepper when you serve them. They are pretty good. They don't taste anything like regular corn. I think you have to have a taste for them. My husband doesn't like them. I like them, & our both our kids LOVE them.
 To think that years ago I used to just toss these babies out when I was shucking corn!
If you get a chance to grow corn, don't throw the little babies out, steam 'em up & eat 'em.
Tuesday, September 1, 2009
Harvesting our Indiana Sweet Corn
It's so sweet & delicious that you don't care if you have butter running down your chin while you are eating corn on the cob.
Actually, that's part of eating it. :)
We had 3 50 foot rows of corn this year, & we were blessed with a wonderful crop.
This wheelbarrow is full of 1 row of corn.

Here the tractor wagon is holding the other 2 rows.
 It took me quite a few hours to shuck this load. We also had a lot of baby corn this year, but I'll do a seperate post on them later.
We had a lot of really nice ears.
 Here is our process for preserving the corn by freezing it.
Freezer Corn
Shuck the corn & remove all the silk.
Rince the corn in a sink full of water.
Bring large pots of water to a boil.
Place the corn in the boiling water, & when the water returns to a boil, time the corn for 5-6 minutes.
Immerse the boiled corn into a sink full of ice water.
Cut the corn off the cob.
Place into freezer bags. (I put 3 cups into quart freezer bags.)
Write the date on the bags & put them in the freezer.
To prepare the freezer corn:
Remove from freezer & thaw overnight in the frig, or pop it in the microwave for 1 minute. Add 1-2 T. butter & some salt & pepper. Cook (microwave or stovetop) until warmed through. Easy. Delicious.
It really is easy. It's not near as tedious as green beans. After canning green beans I always look forward to doing the corn!
One 'trick' that I use is that I have a 'system' using my double sinks. If you've got a LOT of corn, you can set it up as sort of an assembly line. The corn can be stacked on the counter to the left of the sinks. The corn getting rinsed sits in the left sink. The corn that is done, that has been boiled for 5 or 6 minutes sits in the right sink. You wont get them mixed up, because the corn that has already been blanced is a deeper color than the un-blanced corn.
As far as cutting the corn off the cob, my husband likes to use a nice sharp knife. After you cut the corn off the cob, be sure to use the back of your knife & go over the cob again to get all the 'corn juice'. I like to use what I call a 'corn cutter'. I know that's not the name of it. It's not one of those plier looking things, it looks more like a slicer. I really like it. I can cut corn really fast with it. I've never cut myself with it, but it wouldn't be pretty if that ever happened. I have used this 'corn cutter' for at least 15 years. My M-i-L gave it too me, & I think she got it at a garage sale. You can also use an electric knife. That's what my dad always used.
Here is our table full of corn! You can see my corn cutter on the left side of the table. My husband & I work together & it makes it go faster. We each have a spot at the table with a pan of corn ready to be cut, our cutting areas (LOOK at those two mountains of corn!), & we also have a bag for the cobs but I moved it for the picture. When we've cut a bit of corn, I stop cutting & get it all bagged up. I put 3 cups per quart freezer bag. Then I rinse the bags (they get sticky) & set them on a towel to dry & go back to cutting. When I go to bag the next load I date the load I did earlier & put it in the freezer.
 This year I didn't get a picture of all the bags when we were done, because we had so much I needed to put them away in the freezer as we worked.
Our total this year was 54 quart bags.
It's so great to fill the freezer back up with corn.
Thank you LORD our Provider for a wonderful harvest.
Saturday, August 22, 2009
Thursday, August 13, 2009
Deep Fried Zucchini Sticks
Deep Fried Zucchini Sticks
Zucchini, peeled, cut into sticks, or wedges like big oven fries
eggs
milk
Italian style bread crumbs OR flour
salt
pepper
and any spices you'd like to add...I usually add garlic & onion powder. Somtimes I add seasoned salt.
In a large bowl, stir together eggs, milk, salt & pepper.
In another pan (I usually use a pie pan, it's a good size for this) place the bread crumbs. OR you can use flour that you've add some seasoning too, like salt, pepper, & garlic & onion powders.
Drop each stick into a deep fryer with the oil set to 375 (you can use a big pan with oil in it on the stove, oil temp at 375). Fry for 3-4 minutes. Drain well, blot with paper towl, sprinkle with salt.
Let it cool a little (this is hard for me!), eat, & enjoy!
Here is a picture of the deep fried zucchini sticks made with store bought Italian bread crumbs:


Monday, August 10, 2009
Cucumber and Onion Salad
 Here is another recipe that my m-i-l gave me about 20 years ago. It's that sweet 'n sour cucumber salad that used to be at all family dinners & pitch ins.
 Thursday, August 6, 2009
Adventures in Green Beans
Our dogs, Louie & Otto, wanted to help us. Actually they wanted to sneak green beans & eat them. Here's Louie, pretending he's just relaxing & keeping watch while we're picking. He would get up & sneak a bean out of our boxes, & then go hide behind the onions (right behind him in this picture) to eat his bean. He thought we couldn't see him behind those onions! LOL

After 3 hours, here's what we picked.
 My husband lit up our burn pile ( just various limbs & stuff that we burn every once in a great while) & we sat around a campfire for many hours, just breakin' beans & eating s'mores.
 In this picture, you can see that Louie is gaurding the boxes of beans. He's pretending that he's just relaxing with his ball, but everytime I looked over at him, he had moved just a little closer to the beans. He was just waiting for us to not look at him so he could sneak another bean. LOL
 And here are both of our gaurd dogs (bean gaurd dogs! LOL) on duty. Otto's snout looks funny in this picture...that's because he's eating a green bean!
 I started canning late, WAY too late in the day for this big mess 'o beans. I put the first load in the canner about 3:00pm.
This is the first canning load of the season!
 This was a beautiful sight... but by the early morning hours, quite frankly, I was getting a bit tired of it! LOL
We had so many beans, that for the first time in my life, I didn't finish canning them. I couldn't go on. At 5:50AM I took my last load off the burner. I drained the sink full that I still had in the sink, put them in big pans, put them in the frig, hoped for the best & went to bed. I had canned 70 quarts of beans.
Bless my dear husband's heart, I woke up at 10:30am (hey, I got 4 1/2 hours of sleep!) & he was finishing up canning the last of the beans! He canned 20 quarts, so our grand total for this pickin' was 90 quarts!
WOOOOOOOOOOOOOOOOHOOOOOOOOOOOOOOOOOOOOO!
Here they are, all ready to be stored for the winter.
 I had to find storage place for them quickly...to make room for my zucchini. LOL
You can see just some of those hiding behind the beans.
To be honest, we should have picked the weekend before, but we were just so busy with things that we couldn't do it. Then we weren't able to do it through the week, so it fell to last weekend. The unseasonably cool weather saved us on this one, because if it were as hot as it usually is here in Indiana in August, those beans would have been spongy if they'd been left on the vine too long. Normally, we would have had our first pickin' over a week ago & canned 40-50 quarts. Then picked again last weekend & got another 40-50 quarts. So really, this 90 quarts was 2 pickins' done at one time. LOL
Whew. It's a lot of work.
But it is very worth it.
I have been thanking God all week for this green bean harvest.
Now, I was hoping the corn would be ready this weekend, but it may be a few more days. And the tomatoes are coming on slowly, we get a few a day, but as soon as we have a few 90 degree days, we're going to have LOTS of them.
Thursday, July 30, 2009
Buttered Zucchini
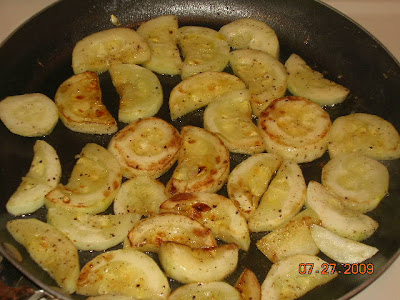 I would have thought that I would have tried this method of cooking zucchini by now, but believe it or not, I haven't. I was looking for a quick way to cook up a zucchini the other day for lunch. I didn't feel like the mess of regular fried zucchini (dipped in egg then flour then fried...YUM)
so I just decided I'd saute them.
Zucchini sauted in Butter
2-3 T Butter (NOT margarine)
1-2 zucchini (depending on size) peeled (or not), & sliced
salt & pepper
garlic salt (opt.)
Melt butter in large skillet. Add zucchini, salt, pepper, & garlic salt. Cook until tender.
I like mine to get a little browned. The browning from real butter gives it such a nice flavor.
Mmmmmmm....it's so good! We'll be having some with supper again tonight.
I'm thinking zucchini needs a catagory all to its own on my side bar. Maybe I'll do that...yes, I will!
Tuesday, July 28, 2009
Coffee Chocolate Bundt Cake from Amish Friendship Bread Starter
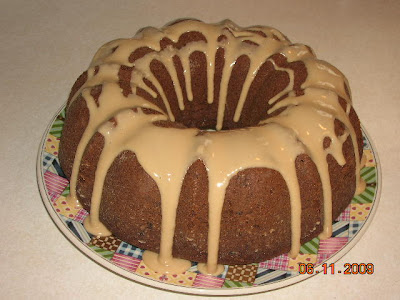 Coffee-Chocolate Bundt Cake (made from Amish Friendship Bread starter)
On day 10, after you have "fed your starter" & seperated new starters into different bags, there should be about 1 cup of starter left in your bowl.
To this add:
1 cup of oil (or 1/2 cup applesauce & 1/2 cup oil)
1/2 cup milk
3 eggs
1 tsp. vanilla extract
Mix this well with your wooden (or plastic) spoon.
In a separate bowl, mix:
1 cup sugar
2 cups flour
1/2 tsp. baking soda
1 large box chocolate instant pudding
1 1/2 tsp. baking powder
3 t. instant coffee
1/2 C. chocolate chips
Add the dry ingredients to the wet mixture & mix thoroughly. Pour into a well greased & lightly floured bundt pan. Bake at 325 for 1 hour. Cool for 10 minutes then remove from pan.
When cake has cooled (it could still be warm if you'd like...YUM) drizzle it with a powdered sugar glaze. We still had coffee in the coffee maker, so I put a teaspoon (or so) of brewed coffee into a half a cup or so of powdered sugar. Oh....it was so good!
I just made one of these again yesterday & put it in our freezer for a rainy day.
I also put my starter in the freezer...I need a break from it for a while. I've been making Amish Friendship Bread every 10 days since May 3rd! Besides, I have zucchini coming out of my ears again, so it's time to start baking zucchini bread & zucchini oatmeal muffins & put them in the freezer too. I still have a few pictures of the different variations of this Amish Friendship Bread, so I'll still post them when I get around to it, even though I'm DONE baking it for a while. :)
Tuesday, July 21, 2009
Lemon Poppyseed Amish Friendship Bread
Since I posted about Amish Friendship Bread, I wanted to post some of the variations of this delicious bread. One of my husband's favorite is Lemon Poppyseed. One recipe of Amish Friendship Bread makes 2 loaf pans, or you could use just one bundt pan (& that sure helps if you're making more than one batch).
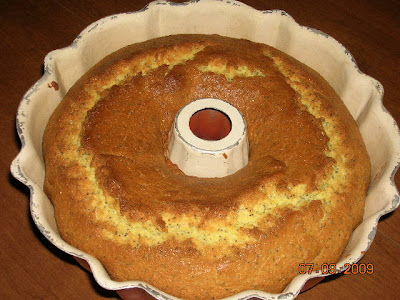
Lemon Poppyseed Amish Friendship Bread
On day 10, after you have "fed your starter" & seperated new starters into different bags, there should be about 1 cup of starter left in your bowl.
To this add:
1 cup of oil (or 1/2 cup applesauce & 1/2 cup oil)
1/2 cup milk
3 eggs
1 tsp. lemon extract
Mix this well with your wooden (or plastic) spoon.
In a separate bowl, mix:
1 cup sugar
2 cups flour
1/2 tsp. baking soda
2 small boxes lemon instant pudding
1 1/2 tsp. baking powder
2-3 T. poppy seeds
Add the dry ingredients to the wet mixture & mix thoroughly. Pour into 2 large, well -greased loaf pans (OR 1 BUNDT PAN) that have been coated with with a thin coating of flour.
Bake at 325 for 1 hour
You don't need any icing on this, just slice & eat!
If you do want some icing, just add a little water & a little lemon juice to some powdered sugar to make a nice glaze to drizzle over the top.
I used to make this Lemon Poppyseed recipe a few years ago & I put it in mini muffin pans. It makes wonderful mini muffins. I made so many that I had our freezer stocked with them for a long time!

I sure hope to be better about getting on here & posting some recipes!
Saturday, July 4, 2009
Happy Independence Day!
 Happy Independence Day!
 I found this old poem written by Helen Steiner Rice. It was in a book of her poems that was published in 1981 after her death.
God Bless America
America the beautiful
May it always stay that way-
But to keep "Old Glory" flying
There's a price that we must pay...
For everything worth having
Demands work and sacrifice,
And freedom is a gift from God
That commands the highest price...
For all our wealth and progress
Are as worthless as can be
Without the faith that made us great
And kept our country free...
Nor can our nation hope to live
Unto itself alone,
For the problems of our neighbors
Must today become our own...
So in these times of crisis
Let us offer no resistance
In giving help to those who need
Our strength and our assistance-
And the stars and stripes forever
Will remain a symbol of
A rich and mighty nation
Built on faith an truth and love.
By Helen Steiner Rice
Friday, July 3, 2009
Amish Friendship Bread- Cinnamon Bread
 This is made from the starter called Amish Friendship Bread. You usually get this starter in a gallon sized ziplock bag. Today I'm typing up the "origional" directions for the first 10 days, & then the recipe for the cinnamon bread.
 Amish Friendship Bread
DO NOT USE METAL SPOONS! DO NOT REFRIGERATE!
Day 1- do nothing
Days 2,3,4, & 5-"mush" the bag.
Day 6- add 1 cup flour, 1 cup of sugar, & 1 cup of milk to bag & mush the bag.
Days 7,8,9- "mush" the bag & let the air out of the bag.
Day 10-add 1 cup of flour, 1 cup of sugar, 1 cup milk to the bag & mush it really well (get all the lumps out that you can).
Pour this mixture into a large bowl. Stir with a wooden spoon & pour four 1 cup starters into gallon zip lock bags. You can give all four away, or give away 3 & keep one as a starter four your next batch. All of these starters are now at day 1.
There should be about 1 cup of starter left in your bowl.
To this add:
1 cup of oil (or 1/2 cup applesauce & 1/2 cup oil)
1/2 cup milk
3 eggs
1 tsp. vanilla
Mix this well with your wooden (or plastic) spoon.
In a separate bowl, mix:
1 cup sugar
2 cups flour
1/2 tsp. baking soda
1 large box vanilla instant pudding
1 1/2 tsp. baking powder
2 t. cinnamon
1 cup chopped nuts (optional)
Add the dry ingredients to the wet mixture & mix thoroughly. Pour into 2 large, well -greased loaf pans that have been coated with the cinnamon & sugar mixture (see below).
Sprinkle extra cinnamon sugar on top.
Bake at 325 for 1 hour.
Cinnamon & sugar mixture=1 tsp. cinnamon & 3 tsp. sugar
Tuesday, June 30, 2009
Kitchen Tip Tuesdays: Amish Friendship Bread Half Feeding
 I thought of another tip. This is about Amish Friendship Bread. You know that starter that someone gives you in a big ziplock bag? You have to "mush" the bag for 5 days, & on the the 6th day you "feed it" 1 cup milk, 1 cup four, & 1 cup sugar. You feed it this same amount of milk, flour, & sugar on day 10, & then it's baking day. After you've "fed" the mixture on baking day, you have 4 new starters, plus 1 cup of batter that you use to make the loaf of delicious cinnamon bread. You usually give 3 starters away to friends, & keep 1 starter for yourself to start all over again (it's day 1 for these starters), & bake one batch of cinnamon bread. It's great...at first. After a few cycles of 10 day periods, you run out of friends to give starters too. Or, all your friends have already had this experience, & they quickly tell you ""NO!" when you offer them a starter. LOL It just gets hard after a while when you can't get rid of, I mean, you can't give away all your extra starters. If you have a hard time wasting things, you end up making several batches of bread on baking day. There are great variations to this recipe so you end up making not just cinnamon bread, but lemon poppyseed muffins, chocolate coffee muffins, caramel apple bread or muffins, & the list goes on & on. It's wonderful to have a freezer filled with so many different kinds of bread & muffins. But it really does make baking day every 10 days a lot of work.
 Well, I had a starter in the freezer & I decided to get it out & have another go at it (it had been 3 years since I had done it). After 3 cycles or so I hit that time where I couldn't get rid of my starters anymore. I found a GREAT tip online. I can't find the link now. I was sure I saved it to favorites so I could link to it, but now I can't find it anywhere. You can actually give your bread "half feedings".
Instead of 1 cup each of the flour, milk, & sugar, you can feed it it a half cup of all of those ingredients. And the result? On baking day, you end up with 3 cups, which means you only have 2 starters & then 1 cup to make a batch of bread with. So you can bake 1 batch, save a starter for yourself, & then have 1 starter left over to either give away or just make a second batch.
On baking day I have been making 2 batches. It's not hard to do, I make them both at once. If I make bread, it means 4 loaves of bread. 4 loaves of bread to bake every 10 days is much more managable.
Another tip for this amish bread is that you can use a bundt pan in place of 2 loaf pans. So if you do it that way, every 10 days you make two bundt loaves, & then only 1 starter to keep going.
And when you get tired of it all & you need to stop, just put that 1 starter in the freezer & you can start the whole thing up later.
 So if you've done this before & cringe when someone offers you a starter, try giving it another chance & only give your starter half feedings. It works really well & that bread really is so good!
Saturday, June 27, 2009
Deep Fried Potato Wedges
 I had never made fried potato wedges. I've just always made potato wedges in the oven & called them oven fries. Oven fries are really good, but sometimes you just need batter covered, deep fried potato wedges. :)
 So I searched the net for a batter recipe & found one on Cooks.com. I did alter it a bit by adding seasonings. It calls for 3/4 C. cornstarch & 1/4 C. flour. I was low on cornstarch & didn't use that much, but other recipes I found just called for 1 C. flour, so I think that's what I'll do from here on out. I'm not sure why it called for cornstarch really.
So here's the recipe I'll use, but may add *more* of the different seasonings.
Batter for Potato Wedges
1 C. flour
1/2 t. salt (or more)
1/4 t. peper
1 t. baking powder
1/2 to 1 t. garlic powder
1/2 to 1 t. celery salt
1/2 to 1 t. seasoning salt
1/2 C. water
1 egg, beaten
In a bowl stir together flour, baking powder, & seasonings.
In another bowl stir together the egg & water. Pour into flour mixture & stir until smooth.
Dip vegetables & deep fry.
We really liked these potatoes. I usually use 9 potatoes for our family of four, whether I'm making mashed potatoes, oven fries, & even cheesy potatoes. I don't ever remember deciding on 9 potatoes, but that's what works for us. It makes a nice sized amount, usually with some left-overs for snacking later. And these deep fried potatoes were delicious as left-overs...cold right out of the frig (what little left-overs there were).
I'm going to keep this batter handy. I think it would be great for onion rings, deep fried cauliflower, or anything I can think of to deep fry. LOL
Friday, June 26, 2009
Radish Sandwiches & My Dad
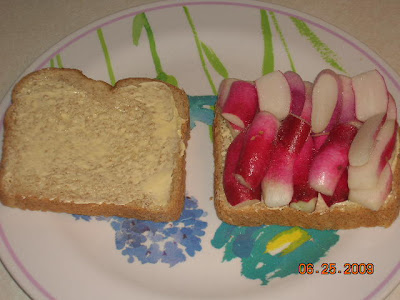 I had some cantaloupe already cut up in the frig, so I added that to my plate. Then I grabbed the quart of pickled beets that I had chillin' in the frig. My mouth watered as I filled my plate, & then I smiled because this was a plate my dad would LOVE. I can still see his eyes light up when I'd bring him out a few quarts of pickled beets. He loved them as much as me. He loved cantaloupe & radish sandwiches were his favorite too.
 So as I prepared my plate, I thought about my dad & how many things he taught me besides how to make a radish sandwich (or an onion sandwich, or a tomato sandwich...LOL). On my first day of school in 1st grade, he let me have a piece of gum. I look back at this a wonder, because we hardly ever had gum when we were little kids. Anyway, he gave me this little piece of Trident & told me that they might not allow gum at school. I told him that if they didn't, I'd go right to the trash can & spit it out. (it makes me giggle to remember this) He said, "Oh no. Don't spit it out, that's not very lady-like. Little ladies don't spit their gum out, they take their gum out of their mouths with their fingers, & then throw it away." I can see him kneeling down one one knee & telling me this. It was probably 1971, & he had a crew cut & his hair was already snow white. When on rare occasions I do chew gum (hardly ever) when I go to spit it out I always remember that & I laugh. It's just a silly thing, but it's something I remember from when I was really little, & my dad wasn't just my dad, it was when he was my daddy....& that was so long ago.
I realized yesterday as I was fixing my fun lunch & thinking of my dad, that the next day (today) is the anniversary of his going home to Jesus. He's been gone 3 years now. I hadn't planned on having a radish sandwich & having it turn into a tribute lunch for my dad, but that's exactly what happened. So I looked around for my camera, & set some things next to my plate that Dad would really get a kick out of. I put the big container of radishes near, & my quart of chilled pickled beets, & of course some salt.
If he were here, he would have loved this lunch & thoroughly enjoyed it as much as I did!
 Here's to you, Dad!
I am so thankful that God blessed me with you for my DAD.
I sure miss you.
I love you.
Thursday, June 18, 2009
Bride's No-Fail Rolls
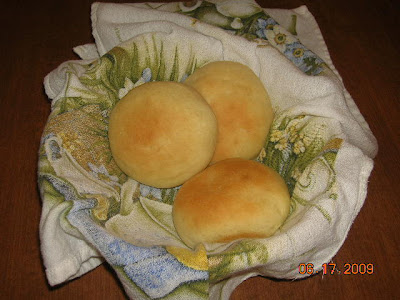 I found this recipe for Bride's No-Fail Rolls in an old cookbook titled Blue Ribbon Recipes County Fair Winners. I was looking through old books & came across this one. I kept hesitating before I put it into the "donate" pile. I finally set it aside because I knew I had to go through every recipe before I could let this book go, or I should say IF I could let this book go.
I'm just over half way through this cook book, & it's looking like it won't get donated. LOL I have personalized it by writing in the front cover the page numbers with the names of recipes that I want to try.
This cookbook was published in 1968, & each recipe has a lady's name with it & which county fair she won ribbons for it. For example, Bride's No-Fail Rolls was submitted by Mrs. Joan Deakins, Craig, Colorado, Moffat County Fair. Pretty neat, huh? I thought so too.
So yesterday I had smoothered chicken in the crockpot & I thought rolls would be good to go with our supper. I've been making breads for a while, but I haven't made rolls in ions. I'm no new bride (our 24th anniversary is in a few months), but since I haven't made rolls in years, I thought this recipe sounded like a good one to start with. And it was! My family loved them.
I wish I would have shaped them a little differently, but they were still really good. I didn't put them in muffin tins, or make cloverleaf rolls with them, I just made balls about the size of golf balls. They came out kind of looking like small buns, but they were so good.
Bride's No-Fail Rolls
1 pkg. yeast (2 1/2 t.)
1 C. warm water
2 eggs, beaten
1/3 C. sugar
1 t. salt
1/3 C. oil
3 1/2 C. flour
Dissolve yeast in water. In large bowl mix eggs & sugar. Add salt. Add oil. Stir in water & yeast. Mix in flour, 1 cup at a time, & stir well. Cover bowl with cloth; let rise until double in size. Punch center to let air out. Make into rolls, & place on lightly greased cookie sheets. Cover & let rise until double in size. Bake at 350 for 10-15 minutes. Yield: 2-3 dozen.
This recipe didn't call for any kneading, so I let the dough rise right in the mixing bowl. The dough is stickier than bread dough, so I put some flour on the table to dust my hands with while I was making the dough shapes.
The size I made (golf ball sized) yielded exactly 2 dozen. I served 1 dozen with our supper & under cooked the other dozen by just 2 or 3 minutes. When they cooled I put them in a large freezer bag & put them in the freezer. When I use them, I'll defrost them & bake them at 350 for maybe 5 minutes, & they'll hopefully be the same as just fresh baked rolls.
I didn't take a picture of my plate, because we were all so hungry we just dug right in.
These rolls are a definite KEEPER.
Saturday, June 13, 2009
Grilled Cabbage
Grilled Cabbage
1 medium head cabbage
1/3 C. butter, softened
1/4 C. onion, chopped
1/2 t. garlic salt
pepper
Cut cabbage into 8 wedges; place on a double thickness of heavy-duty foil (I just used regular foil). Spread cut sides with butter. Sprinkle with onion, garlic salt, & pepper.
Fold foil around cabbage and seal tightly. Grill, covered, over medium heat for 20 minutes or until tender. Open foil carefully to allow steam to escape. Yield 8 servings.
Here's my cabbage just before going on the grill:

And here it is after grilling.

It was delicious!
Thursday, June 11, 2009
Grilled Tilapia with Pineapple Salsa
It is on page 56 & is listed as "inspected for value: estimated cost per serving as $1.81".
I had never grilled tilapia before, & I had never ever made pineapple salsa before, so I was excited for us to try something new tonight.
Here's a picture of the beautiful & tasty pineapple salsa:

Grilled Tilapia with Pineapple Salsa
2 C. fresh pineapple, cubed
2 green onions, chopped
1/4 C. green pepper, finely chopped
1/4 C. fresh cilantro, minced
4 t. plus 2 T. lime juice, divided (I used lemon juice)
1/8 t. plus 1/4 t. salt, divided
dash cayenne pepper
1 T. canola oil
8 tilapia fillets (4 oz. each)
1/8 t. pepper
In a small bowl, combine the pineapple, onions, green pepper, cilantro, 4 t. lime juice, 1/8 t. salt, & cayenne. Chill until serving.
Combine oil and remaining lime juice; brush over fillets. Sprinkle with pepper & remaining salt.
Coat grill rack with cooking spray before starting grill. Grill fish, cover over medium heat for 3-4 minutes on each side or until fish flakes easily with a fork.
Serve with pineapple salsa.
I served this with grilled cabbage, which was also a new thing for us.
 I really liked this. The pineapple salsa was really good! Those flavors just tasted wonderful together. We weren't all of the same opinion on this though. My husband is not really a fan of fish, so he didn't really care for it. Our daughter didn't care for the salsa, but she really liked the fish. She dipped her fish it into a lemon herb tarter sauce. Our 6 year old LOVED it, he had two large helpings of the fish & salsa!
I'll post the recipe for the grilled cabbage next. Because I love cabbage, this was a big hit with me.
Tuesday, June 9, 2009
Kitchen Tip Tuesday
 My tip this week is how to keep mashed potatoes warm for supper (or dinner if that's what you say at your house).
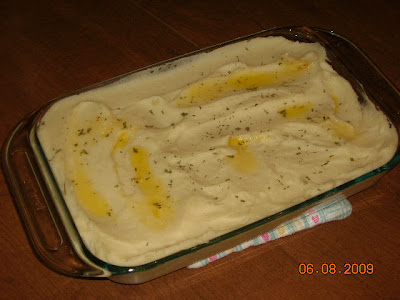
Mashed potatoes cool down quickly, so you usually whip these up last. But, sometimes I mis-figure the time & like this evening, I had my potatoes done way too early. So I put my mashed potatoes into my 7X11 pyrex dish, dotted them with butter, sprinkled on a little parsley (this is optional), & stuck them in the oven at 225 to just keep them warm.
Here they were before going into the oven to keep warm.
 And here they are about 15 minutes later after coming out of the warm oven when the rest of the meal was finally ready.
 I reckon you could just use the microwave (especially in the summer), but the warm oven does truly keep them warm at an even temperature.